Powder Painting
Notes from 1st Time Powder Painting
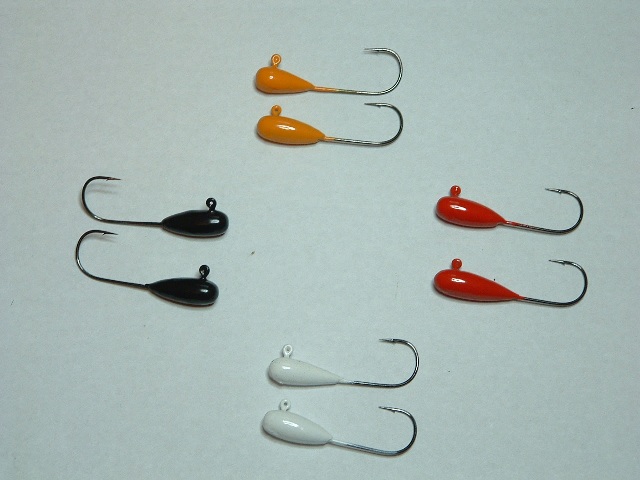
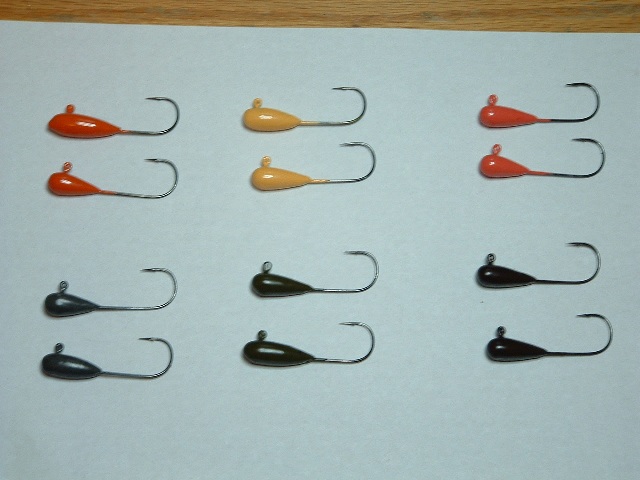
I painted over 150+ jig heads over two days approximately 4 hours per day. Primarily used three colors (Green Pumpkin, Black, Brown) but also used a little White and Chartreuse on a few swim jig heads. The method used utilized a toaster oven for heating and curing. All jigs were painted to a "fishable" state. Only a handful had too much paint causing bulges, and a couple did not have complete coverage of the bait retainer. Only the critical eye of a fisherman would notice these defects. :)
Prior to performing painting, I read many a tip from:
• Tackle Underground forums
•TJ's Tackle Supply
•Jann's Netcraft Lure Component Supply
•Pro-tec Paint Literature
The following notes are to document what worked for me and what did not. Also notes provided for reminder for things to improve on for the next batch, whenever that should come.
Jigs: The following jig sizes and types were painted:
•1/8, 1/4, 3/8, and 1/2 oz Football Jig heads.
•1/8, 1/4, 3/8, and 1/2 oz Arky Jig heads.
•1/8, 1/4, and 3/8 oz Round Finesse Jig heads.
•1/4 and 3/8 oz Swim Jig heads.
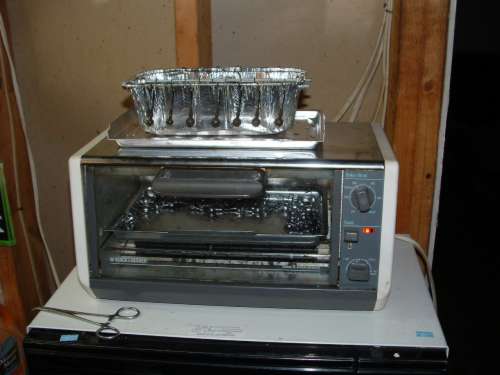
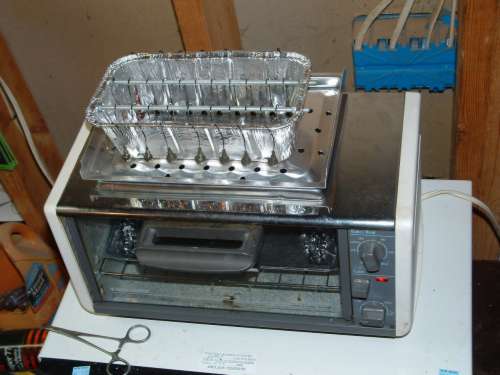
Apparatus used:
•Regular size toaster oven with removable trays.
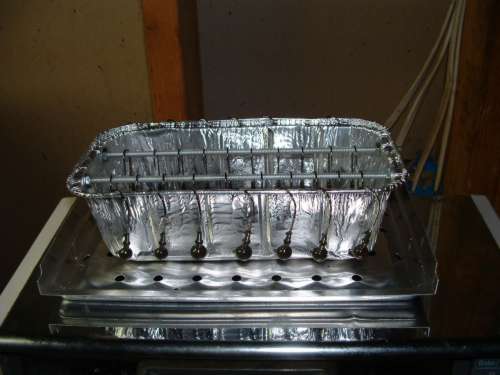
•Cooling Rack (from old microwave oven rack).
•Curing Rack (from old microwave oven rack).
Tools:
•Hemostats
•Pliers
•Spring-loaded clothespins for tray removal
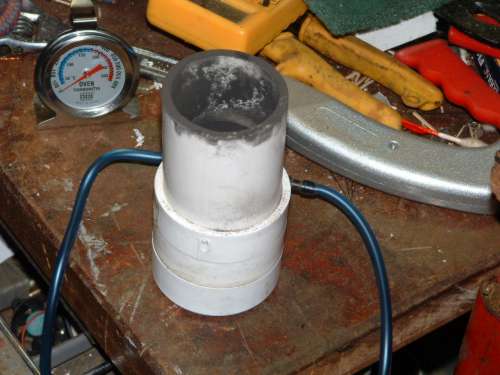
•Oven thermometer to check initial temperatures
Materials:
•Unpainted Jig Heads w/o weed guards installed
•Pro-tec Powder paint in 2 or 4 oz containers.
General Process:
•Pre-heat oven to 350 degrees, checking with thermometer.
•Heat jig heads for 25 minutes before painting.
•Paint smallest size first.
•Remove one at a time to paint, with hemostats, close toaster oven door.
•Quick Dip and quick swirl in paint.
•Tap off extra paint, weed guard hole facing down for 1st couple taps.
•Rotate and tap off all extra paint. Do quickly after dip and swirl.
•Hang on curing rack.
•Cover and fluff paint between each jig painting.
oNote: tapping causes paint to settle, and larger jigs need to be immersed further in paint
•Paint about 20 jig heads to a batch.
•Clean paint from hook eye with "eye buster" before putting each jig in curing rack.
•Remove most/all paint from hook eye.
•Place next batch of 20 jig heads on bottom pan.
•Place curing rack on top of jig heads.
•Cure for 20 minutes at 350 degrees.
•Remove curing rack and let cool.
•Let jig heads heat for another 5 minutes before starting painting process again.
Switching Colors:
•Use one paint at a time.
•Paint all jig heads of same color before changing.
•Clean paint dust from hemostats and other tools on change.
•Clean bench area of any paint dust.
•Fluff new paint well, before first dip.
•Test fluff with "cold" jig, re-fluff.
Notes:
•Don't focus on glossy or dull of jig heads after paint. I had some of both, and most had glossy and dull spots. Curing process made them all look great.
•The above might have been required more of the "torch" method.
•Do not double dip. You will end up with too much paint.
•Paint is extremely hard to remove from hook eyes after curing.
•Epoxy top coating or nail polish will not be necessary. Jigs will most likely be lost before the paint ever chips.
•FWIW: Black seemed to be the easiest color to work with. GP was probably the hardest because I started with that.
Things that didn't work or didn't work well for me:
•Using hemostat to cover hook eye from getting paint in it. The jig heads I used would not allow easy dipping into 2 oz paint containers.
•Using tooth picks after initial paint coating to remove paint from hook eyes still left some paint that reflowed during curing.
•Homemade curing rack allowed touching of jig heads and did not maximize the number for curing.
•Wooden plugs in weed guard holes was too difficult to handle before dipping in paint. 1st tap and minimize amount of paint applied, minimized the number that needed a drill chaser.
•A few jigs ended up with too much paint and produced "bulges". Work on dip/swirl process.
Purchase/Make for next batch:
•Two curing racks from bread pan (alum foil plus two threaded rods
oShould be able to increase batch size to 30, maybe more.
•Extra set of hemostats
•Empty salt shaker for two-tone paint
•Small Tupperware type containers
•Find something to fill the "dead" time while batch is curing.
•Extra 2 oz Paint containers.