Tube Making
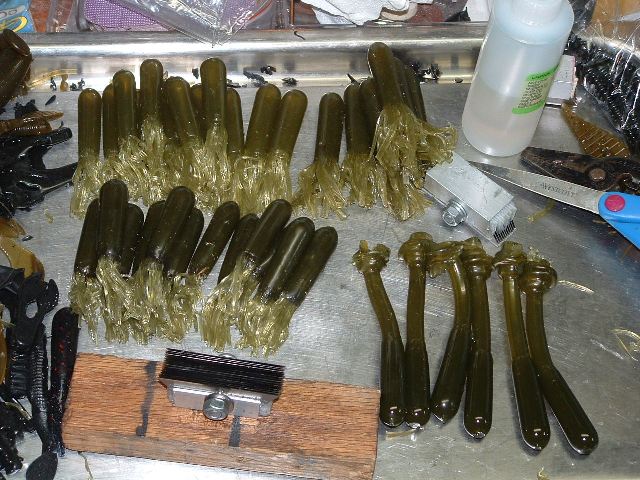
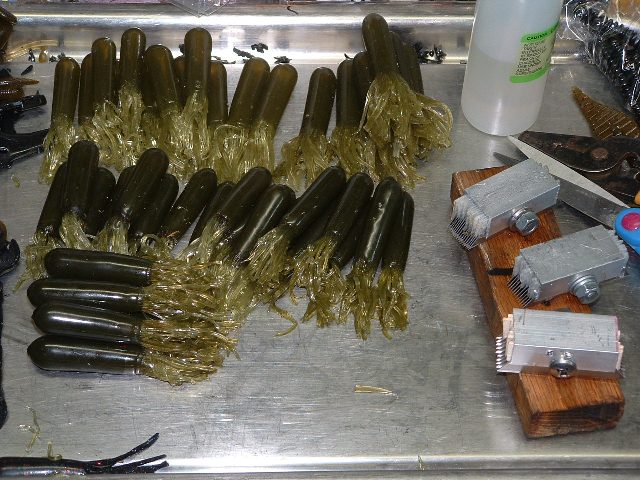
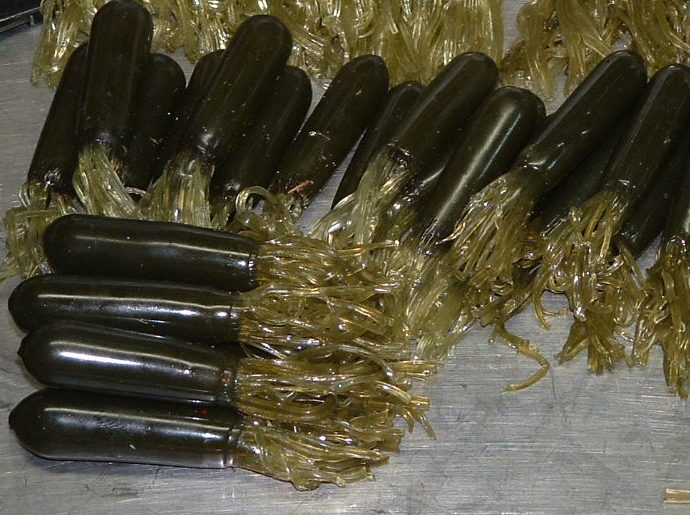
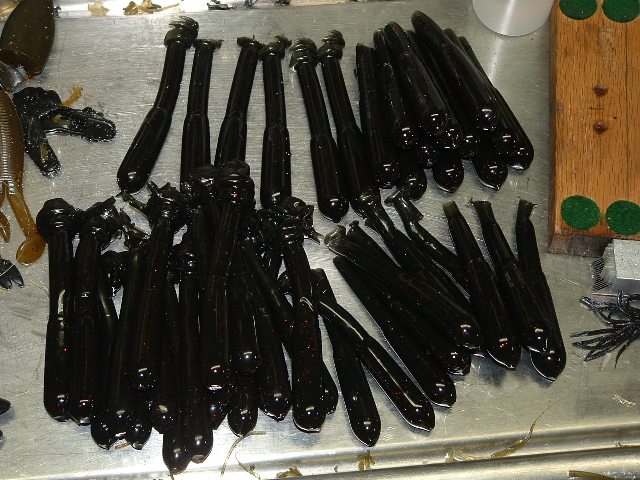
This is my 1st attempt at making my own tubes. I think they came out decent for just basic green pumpkin tubes. Hopefully will be on the water within two weeks to try them out.
A big thank-you to "Bojon" on the TackleUnderground forum.
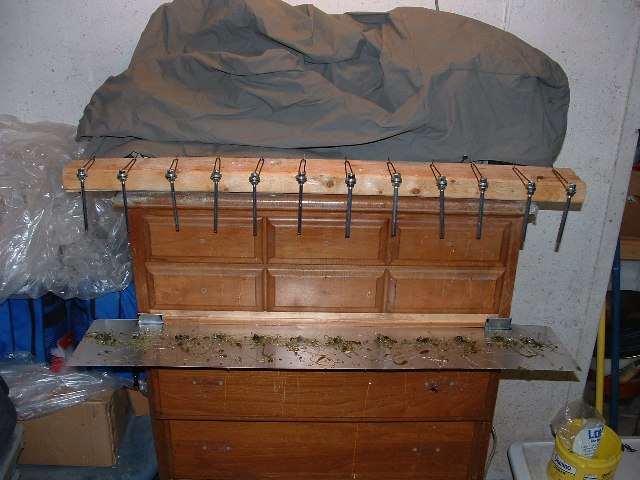
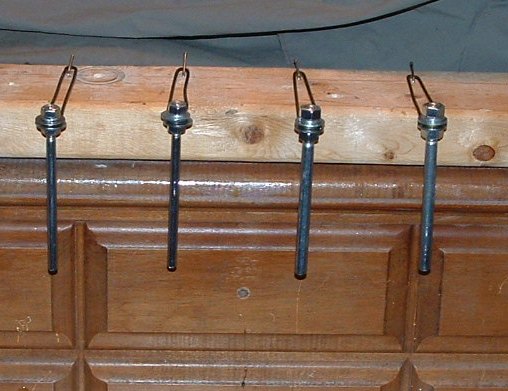
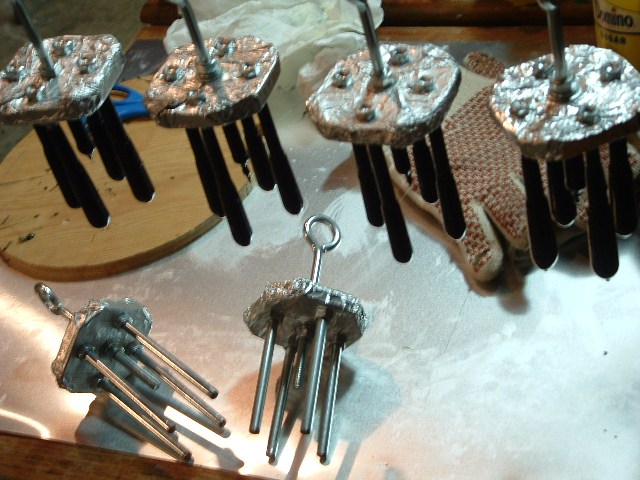
I made some small 4 rod dipping racks for making tubes. They work well for small batches for personnel use type production. Note: the rod size was for smallie based tubes from lengths 3.25" to 3.75". The nose itself will hang down about 1/4" below the rod end.
Parts for One:
- Four shoulder bolts (1/4" or 5/16" X 4.5")
- Eight nuts (1/4" or 5/16") to match rods above
- One 5/16" eye bolt (approx 6" rod length)
- Two 5/16" nuts for eyebolt
- Two 5/16" washers for eyebolt
- One 5/16" lock washer for eyebolt
- One 3" X 3" X (3/8" or 1/2") plywood
- One small aluminum pan
Build Process: (I think it is fairly straight forward)
- Layout pattern on plywood
- Center hole for eyebolt
- Four holes for dipping rods (2" square pattern)
- Trim corners off
- Wrap with aluminum pan (flat side faces down)
- Trim aluminum and flaten with hammer
- Punch bolt holes through aluminum
- Place nut, lock washer, and washer on eyebolt
- Run nut to end of threads
- Insert eyebolt into top center hole of alum/wood block
- Place washer and nut on eybolt and tighten
- Cut-off shoulderbolt heads flush.
- Grind off burr, and slightly round the end
- Run a nut down the threads of each rod.
- Insert rods one at a time adding nut to top and tighten.
- Adjust center eyebolt to desired head dip level
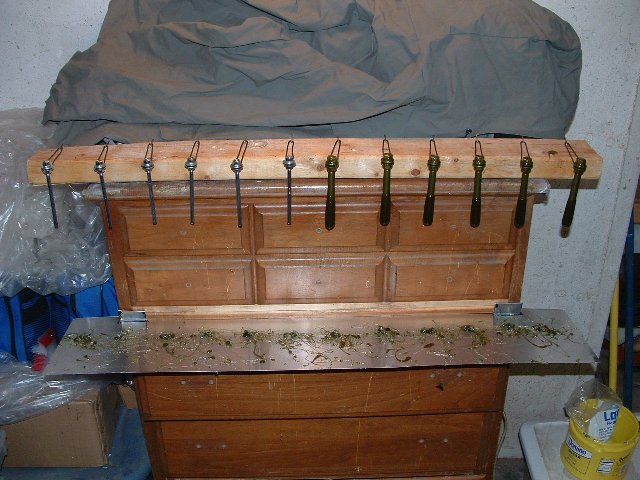
I made a total of six and hang them from a rod high enough to get the 2-cup pyrex under. Some sheet aluminum makes a good drip/string catcher. I used Hard plastic with additional hardner. I use a 2-cup pyrex and a 1-cup pyrex to heat up the plastic. That allows for stirring room, and then just before dipping fill the 2-cup. The 1 cup has some extra to refil the 2 -cup as plastic is used up. One full length (just below nut on rods) dip. Clip strings and noses. Followed by two head dips (center rod just touching the top of the plastisol). Clip strings and noses between dips (note: this helps getting a nice rounded nose).
This process can waste a bit of plastisol. Once I'm done with the rod racks, I move to the horizontal method by Bojon. Just tilting the pyrex at first, but as it gets too low, pouring to a small loaf bread pan (preheated under heat lamp). Also, you can start with light color tubes, and move to GP, and lastly black. I typicaly end up with about 4-6oz of unused plastic. Will save for the next time batch.